

DMZ / GUIDE
Your first deployment
Choose your Operator, pack for one objective and bring your progress home from Hajin.
Check access before preparing a deployment
Installation
DMZ early access began on 20 October for eligible Modern Warfare 4 digital pre-orders. The full-release date is 23 October 2026. Install the launch update and required content packs; the release date is not a live server-status indicator.
In practice
Modern Warfare 4 requires a separate purchase and is not included with Game Pass at launch. Confirm ownership on the platform you intend to use, install the required game content and check the current game menu before troubleshooting your loadout.
WDguide advice
Explore: Check access before preparing a deployment
Useful links
Choose the Operator you intend to risk
Operator choices
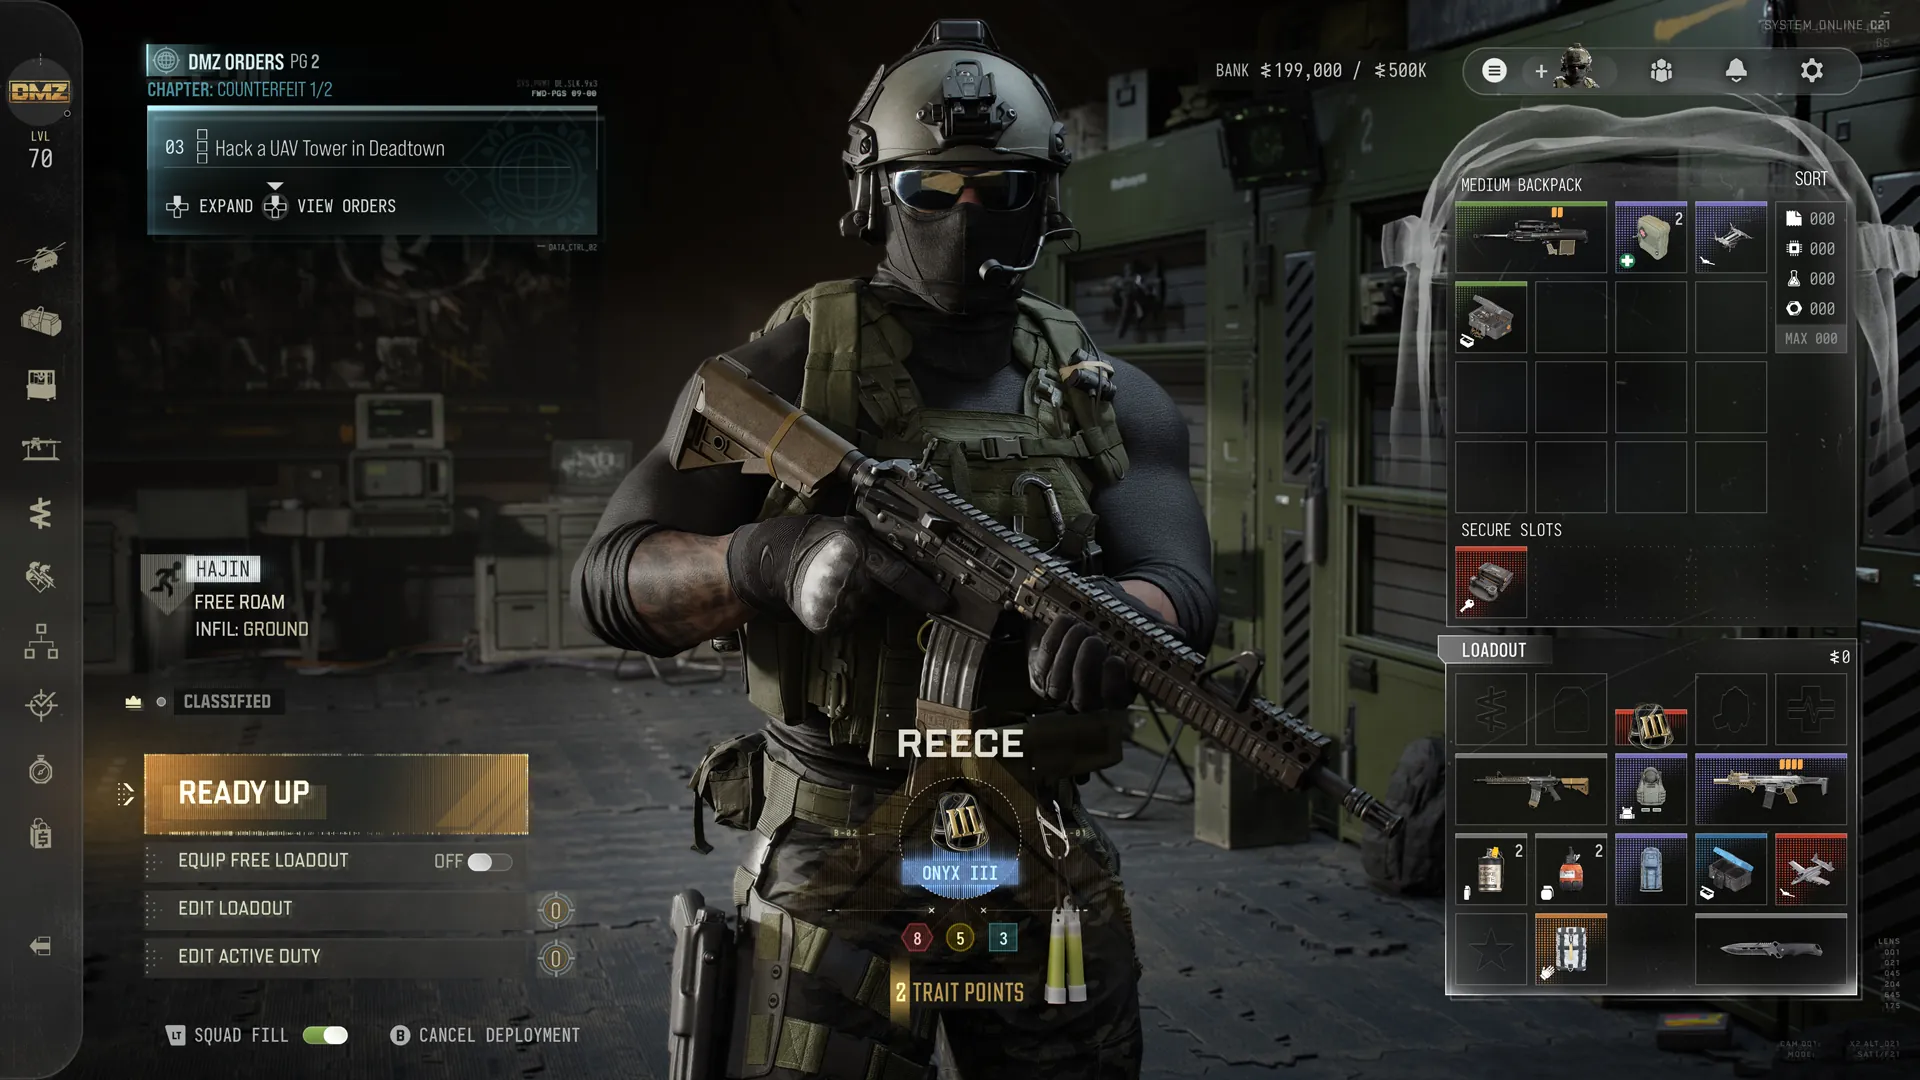
Begin at the Forward Operating Base. Recruit an Active Duty Operator, check their status and choose the character you want to develop. Each Operator has individual Dog Tags and Traits; your overall DMZ player level is a separate progression track.
Recovery
An eliminated Operator becomes MIA. Recovery preserves Traits but costs Banked DMZ Cash, and the recovered Operator needs replacement gear. The exact recovery price depends on progression and is not calculated here.
WDguide advice
Explore: Choose the Operator you intend to risk
Useful links
Build a focused loadout
now lasts 120 seconds. It does not currently hide you from a UAV Tower activated by an enemy Operator with UAV Upgrade. The 2 November update also temporarily disables Infrared mode.
Use Ready Up to review what you will carry. A Free Loadout is available for getting back into the field; your Stash provides equipment you have kept between deployments. The selected Operator carries the equipment you risk on the run.
Inspect your backpack rather than assuming every model has the same capacity or protection. Our item panels show recorded differences; missing statistics stay unrecorded.
- Choose a weapon you can handle and replace.
- Check healing, armor and carrying space.
- Keep supplies for leaving the area, not only entering it.
Explore: Build a focused loadout
Useful links
Loot for one useful goal
Carrying space
Read your Order or selected activity before moving. Loot can support the present objective, replace missing equipment or contribute to a future 3D Printer recipe. Those purposes compete for attention and backpack space.
In practice
Keep a short priority list. Compare a new item with your next task instead of automatically taking everything of higher rarity.
WDguide advice
Explore: Loot for one useful goal
Useful links
Leave room for extraction
The essentials
If you use a Truce Flag, its cooldown is now 60 seconds, reduced from 180 in the 2 November update. Check the current in-game state before relying on another use.
Returning safely
Active exfil sites are selected from a pool and identified by green smoke. Call the extraction helicopter, hold the area and board when it arrives. The call attracts attention, so reaching the smoke does not finish the run.
Map checks
Use the current in-game Tac-Map and timer. WDguide map markers are planning references; variable exfil availability must be confirmed during your deployment.
WDguide advice
Explore: Leave room for extraction
Useful links
Return, offload and learn
Reviewing the result
Read the After Action Report to see what the deployment produced. Offload supplies into the shared Stash, check your Operator and decide what to reserve for the next attempt.
In practice
Use the result to adjust one decision: route, loadout, objective or time spent looting. A browser loadout or quest tick is your own record; it does not synchronize with the game.
WDguide advice
Explore: Return, offload and learn
Useful links
Current operation rewards
Returning safely
30 October update: Dynamic Ops award 10,000–20,000 Cash, Side Ops award 2,000 Cash, and completed mission steps award 500 Cash. These are activity rewards, not a guarantee of extraction profit.
Operator choices
The Possum Trait has an activation restriction: it cannot be used while the eliminating team is nearby; its activation failsafe is five minutes, and the required enemy distance is 2.5 times the previous distance. No absolute radius is published. Do not plan an immediate return to the same fight.